Setup Varnish 4 with Wordpress W3 Total Cache on CentOS 6
Optimizing WordPress Site
Optimizing wordpress site can become tricky, if yo do not maintain it properly. Before starting optimization you need to identify your tools and log current page speed statistics of targeted site. This is very important to analyze and present improvements later on.Following tools can be used to monitor Performance:
1. webpagetest.org
2. gtmetrix.com
We will use webpagetest.org and save results for few targeted pages to be optimized. This is a right time when you save some results for future reference.
Install and setup W3 Total Cache
Install W3TC from it's plugin website. Its a powerful caching plugin for wordpress.A detailed guide to setup W3 Total Cache is available here. You can follow it or any other tutorial available online.
Use APCu for Dedicated or VPS Server. Following resources can help you installing APCu.
http://www.joomlaworks.net/blog/item/153-install-apc-apcu-on-a-whm-cpanel-server
https://stackoverflow.com/a/31558558/1897969
Install Varnish
Check if epel-release is installed:Setup Varnish
For setting up varnish we need to update it's basic configuration and how our proxy will act for each request coming. For this you need to edit following files.You can use this gist to update your vcl file.
You can use this gist to update your varnish configuration.
Setup WebServer
Move Apache from port 80 to some other port, lets use port 8080.- Change apache listen port from 80
- Listen 8080
- Change the VirtualHost line from *:80 to *:8080
- <virtualhost *:8080>
- Make sure to use port 80 in varnish configuration
- Restart apache and varnish servers to take effect
Analysis
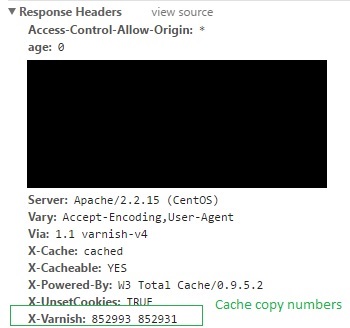
Now you need to take new readings using the same tools mentioned above and see the difference. For debugging the cached information you can see the Headers, set by our varnish configuration (default.vcl).
Varnish Purge & Rebuild Cache
After implementing caching with any tool you must need to keep a system in place so the cache can expire and get new content on time. For this there can be many stretegies and there are also some plugins available and you can also configure W3Total Cache to purge varnish cache on time.
But here we will soon add a mechanism to purge and rebuild all varnish cache after a designated time (e.g. 24 hours).
But here we will soon add a mechanism to purge and rebuild all varnish cache after a designated time (e.g. 24 hours).
hope to see rules of woocomerce too
ReplyDelete